Difference between revisions of "Index:Tanakh and the Ancient Near East/0"
Jump to navigation
Jump to search
| (34 intermediate revisions by 2 users not shown) | |||
| Line 45: | Line 45: | ||
<div class="artgallery index-artgallery"> | <div class="artgallery index-artgallery"> | ||
| − | <div> | + | |
| + | |||
| + | <div> | ||
| + | <a href="Moshe's_Birth_and_the_Legend_of_Sargon" data-aht="page"> | ||
| + | <figure> | ||
| + | <img src="/Media/Olam HaMikra/ANE Inscriptions/Sargon of Akkad.jpg"/> | ||
| + | </figure> | ||
| + | <figcaption>Moshe's Birth and the Legend of Sargon</figcaption></a> | ||
| + | </div> | ||
| + | |||
| + | <div> | ||
| + | <a href="Egyptian_Background_and_the_Exodus_Narrative" data-aht="page"> | ||
| + | <figure> | ||
| + | <img src="/Media/Topics/E/Egyptian_Background_and_the_Exodus_Narrative/Picture1.png"/> | ||
| + | </figure> | ||
| + | <figcaption>Egyptian Background and the Exodus Narrative</figcaption></a> | ||
| + | </div> | ||
| + | |||
| + | |||
| + | <div> | ||
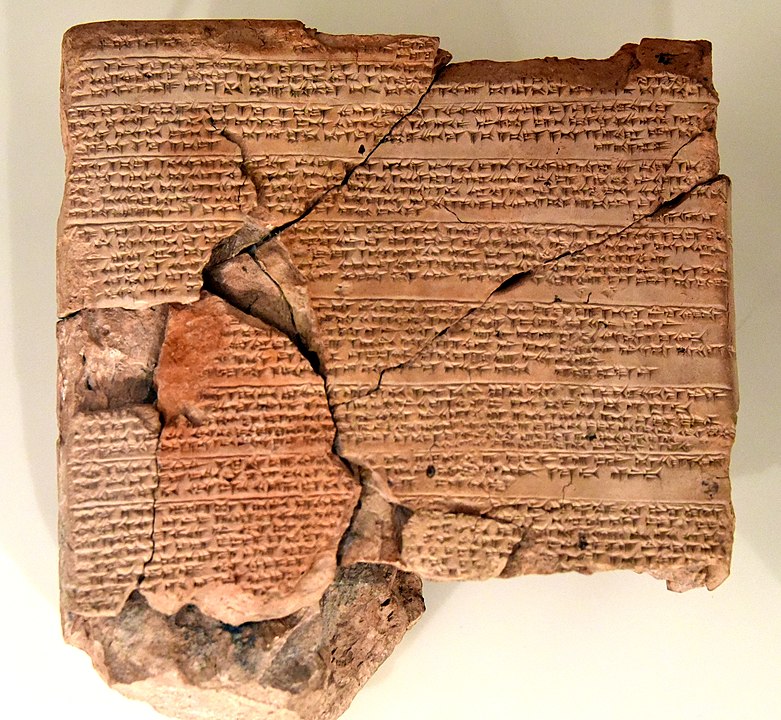
<a href="The_Torah_and_Ancient_Near_Eastern_Law_Codes" data-aht="page"> | <a href="The_Torah_and_Ancient_Near_Eastern_Law_Codes" data-aht="page"> | ||
<figure> | <figure> | ||
| − | <img src="/Media/Olam HaMikra/ANE Inscriptions/Stele with Law Code of Hammurabi.jpg"/> | + | <img src="/Media/Olam HaMikra/ANE Inscriptions/Stele with Law Code of Hammurabi Detail.jpg"/> |
</figure> | </figure> | ||
| − | <figcaption> | + | <figcaption>Tanakh and Ancient Near Eastern Law Codes</figcaption></a> |
| − | |||
</div> | </div> | ||
| + | |||
<div> | <div> | ||
| − | <a href=" | + | <a href="ANE:Treaties_in_Tanakh_and_the_Ancient_Near_East" data-aht="page"> |
<figure> | <figure> | ||
| − | <img src="/Media/Olam HaMikra/ANE Inscriptions/ | + | <img src="/Media/Olam HaMikra/ANE Inscriptions/Egyptian Hittite Treaty.jpg"/> |
</figure> | </figure> | ||
| − | <figcaption> | + | <figcaption>Treaties in Tanakh and the Ancient Near East</figcaption> |
</a> | </a> | ||
| + | </div> | ||
| − | |||
| − | + | ||
<!-- | <!-- | ||
<div> | <div> | ||
| Line 81: | Line 100: | ||
<div class="artgallery index-artgallery"> | <div class="artgallery index-artgallery"> | ||
| − | <div> | + | |
| − | <a href="//mg.alhatorah.org/Dual/Olam_HaMikra/Bemidbar/ | + | <div> |
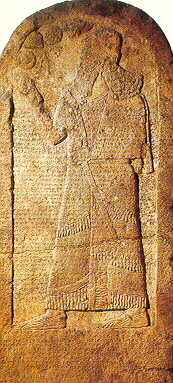
| + | <a href="//mg.alhatorah.org/Dual/Olam_HaMikra/Bemidbar/22.5" data-aht="page"> | ||
<figure> | <figure> | ||
| − | <img src="/Media/Olam HaMikra/ANE Inscriptions/ | + | <img src="/Media/Olam HaMikra/ANE Inscriptions/Balaam Inscription.jpg"/> |
</figure> | </figure> | ||
| − | <figcaption> | + | <figcaption>Balaam Inscription</figcaption> |
</a> | </a> | ||
</div> | </div> | ||
| Line 111: | Line 131: | ||
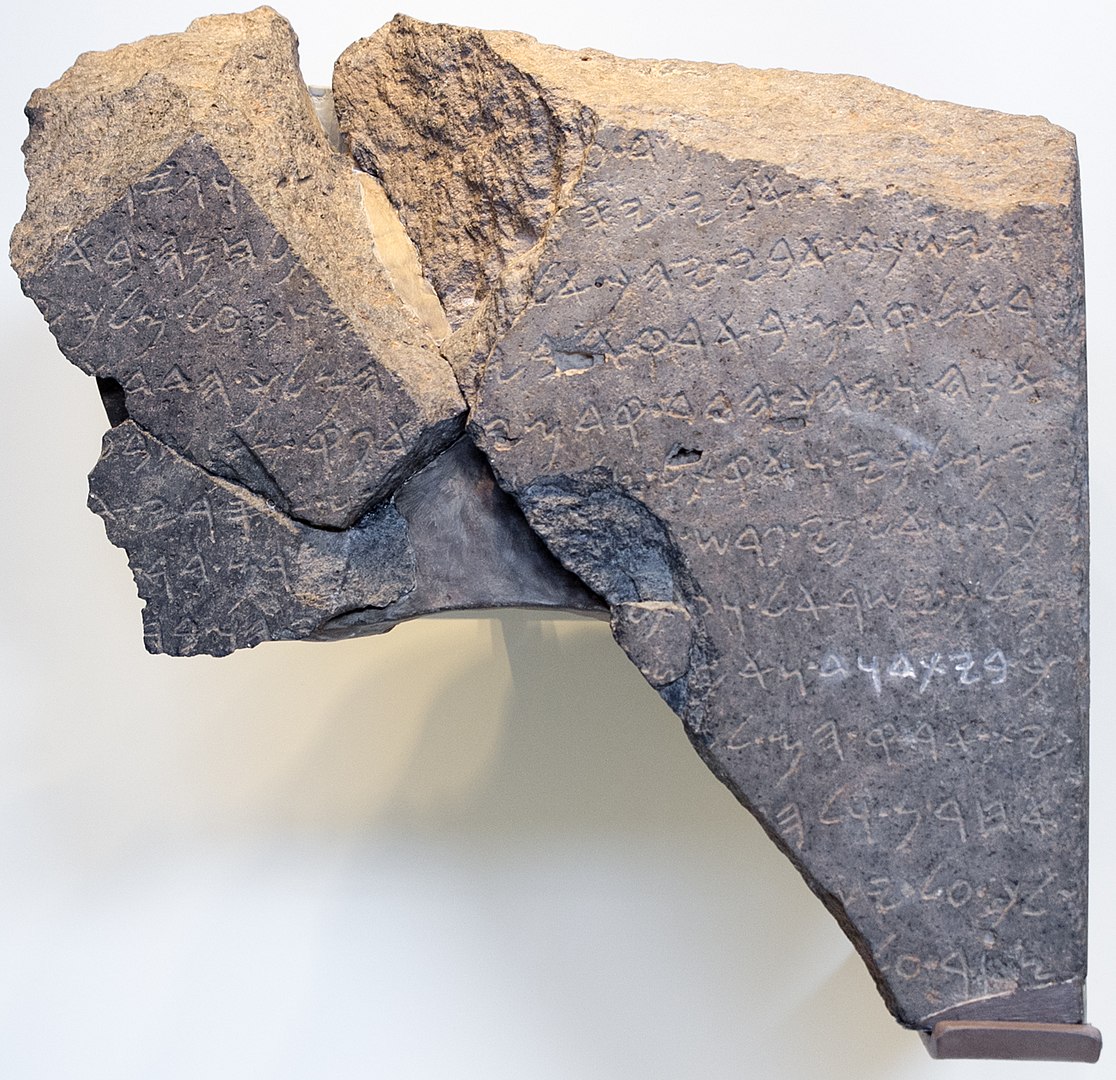
<a href="ANE:Treaties_in_Tanakh_and_the_Ancient_Near_East" data-aht="page"> | <a href="ANE:Treaties_in_Tanakh_and_the_Ancient_Near_East" data-aht="page"> | ||
<figure> | <figure> | ||
| − | <img src="/Media/ | + | <img src="/Media/Olam HaMikra/ANE Inscriptions/Egyptian Hittite Treaty.jpg"/> |
</figure> | </figure> | ||
<figcaption>Treaties in Tanakh and the Ancient Near East</figcaption> | <figcaption>Treaties in Tanakh and the Ancient Near East</figcaption> | ||
| Line 130: | Line 150: | ||
</div> | </div> | ||
| − | <h2 style="text-transform:none; text-align:center; font-size:1.3em; margin:2em 0 1em 0">Sefer Melakhim</h2> | + | <h2 style="text-transform:none; text-align:center; font-size:1.3em; margin:2em 0 1em 0">Sefer Melakhim I</h2> |
<div class="artgallery index-artgallery"> | <div class="artgallery index-artgallery"> | ||
| Line 139: | Line 159: | ||
<img src="/Media/Olam HaMikra/ANE Inscriptions/Bubasite Portal at Karnak - Shoshenq I Relief.jpg"/> | <img src="/Media/Olam HaMikra/ANE Inscriptions/Bubasite Portal at Karnak - Shoshenq I Relief.jpg"/> | ||
</figure> | </figure> | ||
| − | <figcaption>Shishak's Campaign and Egyptian Sources | + | <figcaption>Shishak's Campaign and Egyptian Sources</figcaption> |
| − | |||
| − | |||
| − | |||
| − | |||
| − | |||
| − | |||
| − | |||
| − | |||
| − | |||
</a> | </a> | ||
</div> | </div> | ||
| − | |||
| − | |||
| − | |||
| − | |||
| − | |||
| − | |||
| − | |||
| − | |||
<div> | <div> | ||
| Line 166: | Line 169: | ||
<img src="/Media/Olam HaMikra/ANE Inscriptions/Kurkh Monolith - Stele of Shalmaneser III.jpg"/> | <img src="/Media/Olam HaMikra/ANE Inscriptions/Kurkh Monolith - Stele of Shalmaneser III.jpg"/> | ||
</figure> | </figure> | ||
| − | <figcaption>Achav, Aram, and the Battle of Qarqar | + | <figcaption>Achav, Aram, and the Battle of Qarqar</figcaption> |
</a> | </a> | ||
</div> | </div> | ||
| Line 192: | Line 195: | ||
</figure> | </figure> | ||
| − | <figcaption>Aram's Relations with Israel in Assyrian Sources | + | <figcaption>Aram's Relations with Israel in Assyrian Sources</figcaption> |
</a> | </a> | ||
</div> | </div> | ||
| Line 202: | Line 205: | ||
</figure> | </figure> | ||
| − | <figcaption>Chazael and the Tel Dan Stele | + | <figcaption>Chazael and the Tel Dan Stele</figcaption> |
</a> | </a> | ||
</div> | </div> | ||
| Line 209: | Line 212: | ||
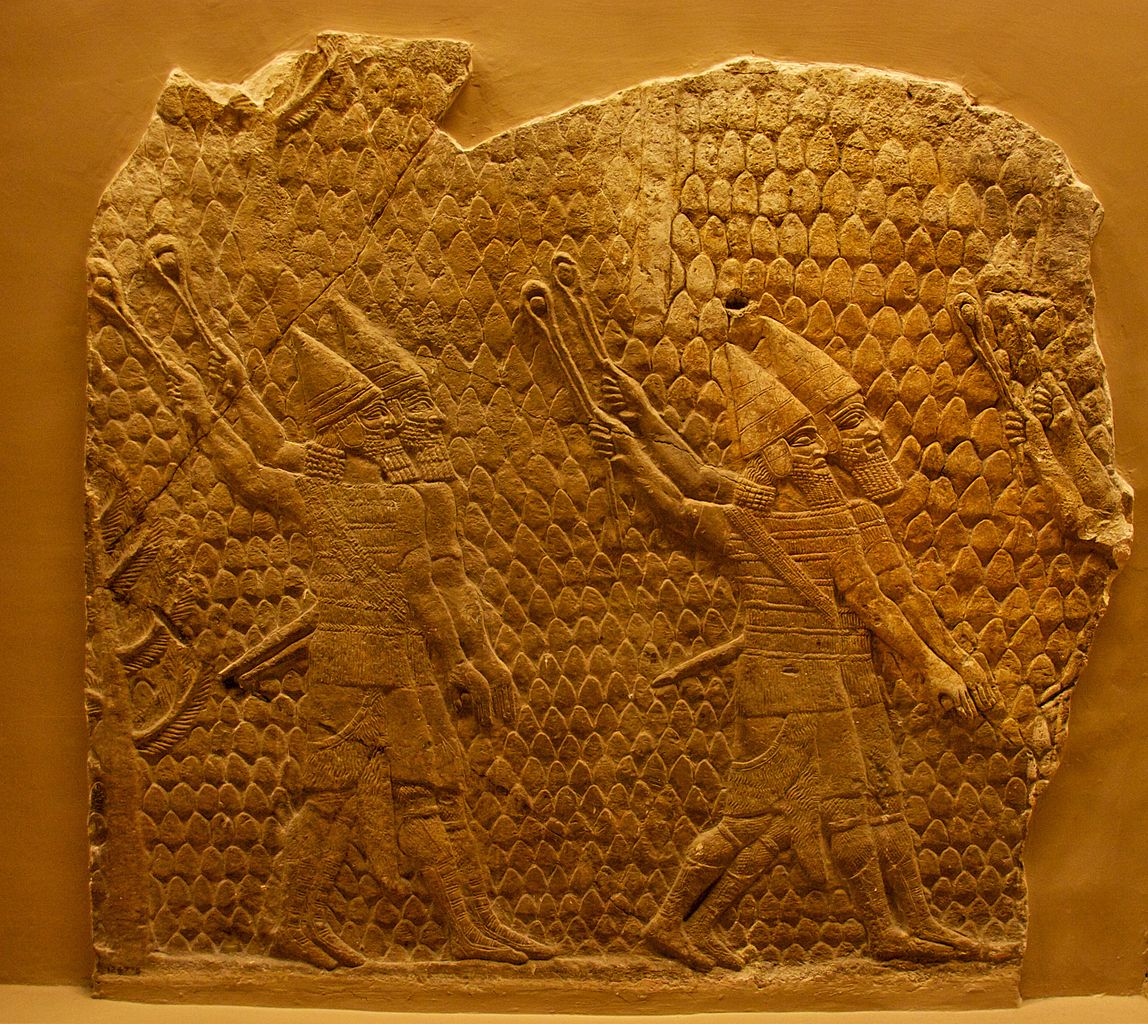
<a href="Sancheriv's_Campaign_and_Assyrian_Sources" data-aht="page"> | <a href="Sancheriv's_Campaign_and_Assyrian_Sources" data-aht="page"> | ||
<figure> | <figure> | ||
| − | <img src="/Media/Olam HaMikra/ANE Inscriptions/Lachish Wall Relief - | + | <img src="/Media/Olam HaMikra/ANE Inscriptions/Lachish Wall Relief - Battering Ram.jpg"/> |
</figure> | </figure> | ||
| − | <figcaption>Sancheriv's Campaign | + | <figcaption>Sancheriv's Campaign</figcaption> |
</a> | </a> | ||
</div> | </div> | ||
| Line 219: | Line 222: | ||
<a href="ANE:The_Last_Kings_of_Yehuda_and_Babylonian_Sources" data-aht="page"> | <a href="ANE:The_Last_Kings_of_Yehuda_and_Babylonian_Sources" data-aht="page"> | ||
<figure> | <figure> | ||
| − | <img src="/Media/Olam HaMikra/ANE Inscriptions/Nebuchadnezzar Chronicle | + | <img src="/Media/Olam HaMikra/ANE Inscriptions/Nebuchadnezzar Chronicle.jpg"/> |
</figure> | </figure> | ||
| − | <figcaption>The Last Kings of Yehuda | + | <figcaption>The Last Kings of Yehuda</figcaption> |
</a> | </a> | ||
</div> | </div> | ||
| − | + | ||
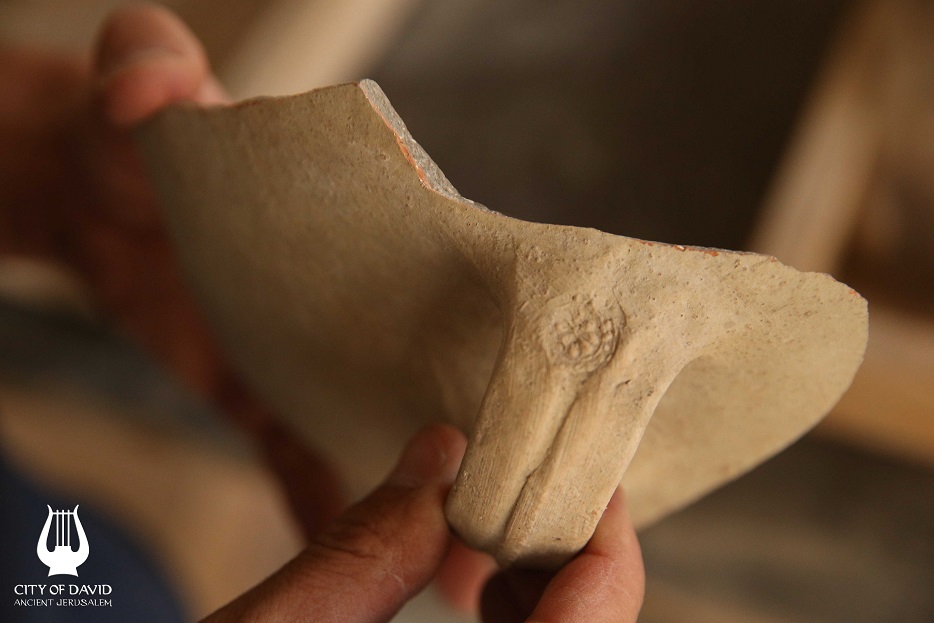
| − | + | <div> | |
| − | + | <a href="//mg.alhatorah.org/Dual/Olam_HaMikra/Melakhim_II/25.9" data-aht="page"> | |
| − | <a href=" | ||
<figure> | <figure> | ||
| − | <img src="/Media/ | + | <img src="/Media/Olam HaMikra/ANE Artifacts/Ir David/Rosetta Storage Jar.jpg"/> |
| + | |||
</figure> | </figure> | ||
| − | <figcaption> | + | <figcaption>Evidence of the Babylonian Destruction</figcaption> |
</a> | </a> | ||
</div> | </div> | ||
| − | + | ||
</div> | </div> | ||
| Line 248: | Line 251: | ||
<a href="Sancheriv's_Campaign_and_Assyrian_Sources" data-aht="page"> | <a href="Sancheriv's_Campaign_and_Assyrian_Sources" data-aht="page"> | ||
<figure> | <figure> | ||
| − | + | <img src="/Media/Olam HaMikra/ANE Inscriptions/Lachish Wall Relief - Slingers.jpg"/> | |
| + | |||
| + | </figure> | ||
| + | <figcaption>Sancheriv's Campaign</figcaption> | ||
| + | </a> | ||
| + | </div> | ||
| + | |||
| + | <div> | ||
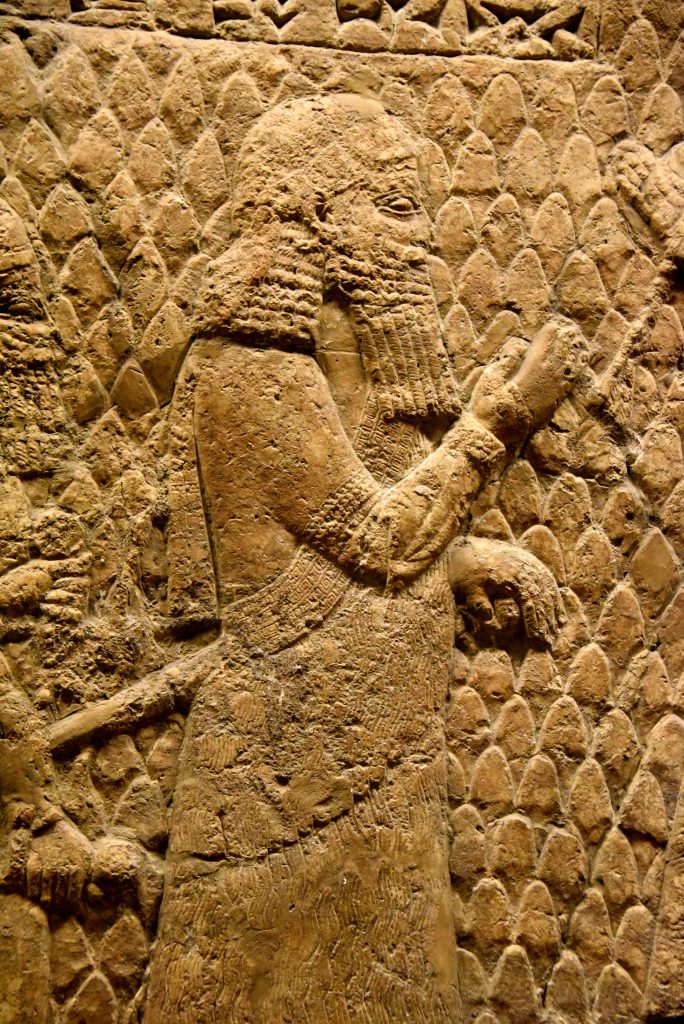
| + | <a href="The_Message_of_Yeshayahu_20" data-aht="page"> | ||
| + | <figure> | ||
| + | <img src="/Media/Olam HaMikra/ANE Inscriptions/Lachish Wall Relief - Possibly Tartan.jpg"/> | ||
</figure> | </figure> | ||
| − | <figcaption> | + | <figcaption>The Message of Yeshayahu 20</figcaption> |
</a> | </a> | ||
</div> | </div> | ||
| + | |||
</div> | </div> | ||
| Line 268: | Line 282: | ||
</figure> | </figure> | ||
| − | <figcaption>Lachish Ostraca | + | <figcaption>Lachish Ostraca</figcaption> |
</a> | </a> | ||
</div> | </div> | ||
| Line 278: | Line 292: | ||
</div> | </div> | ||
| − | <h2 style="text-transform:none; text-align:center; font-size:1.3em; margin:2em 0 1em 0">Ezra</h2> | + | <h2 style="text-transform:none; text-align:center; font-size:1.3em; margin:2em 0 1em 0">Sefer Ezra</h2> |
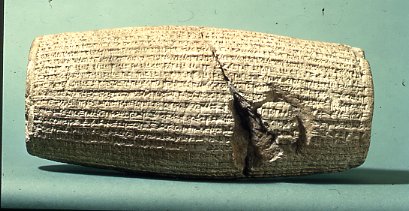
<div class="artgallery index-artgallery"> | <div class="artgallery index-artgallery"> | ||
| Line 286: | Line 300: | ||
<img src="/Media/Olam HaMikra/ANE Inscriptions/Cyrus Cylinder.jpg"/> | <img src="/Media/Olam HaMikra/ANE Inscriptions/Cyrus Cylinder.jpg"/> | ||
</figure> | </figure> | ||
| − | <figcaption>The Cyrus Cylinder | + | <figcaption>The Cyrus Cylinder</figcaption> |
</a> | </a> | ||
</div> | </div> | ||
Latest revision as of 13:54, 15 November 2020
Tanakh and the Ancient Near East
Click on any picture below for discussion.