Difference between revisions of "Index:Tanakh and the Ancient Near East/0"
Jump to navigation
Jump to search
| Line 50: | Line 50: | ||
<img src="/Media/Olam HaMikra/ANE Inscriptions/Stele with Law Code of Hammurabi.jpg"/> | <img src="/Media/Olam HaMikra/ANE Inscriptions/Stele with Law Code of Hammurabi.jpg"/> | ||
</figure> | </figure> | ||
| − | <figcaption>Tanakh and Ancient Near Eastern Law Codes</figcaption></a | + | <figcaption>Tanakh and Ancient Near Eastern Law Codes</figcaption></a> |
</div> | </div> | ||
| Line 58: | Line 58: | ||
<img src="/Media/Olam HaMikra/ANE Inscriptions/Reaper's Plea.jpg"/> | <img src="/Media/Olam HaMikra/ANE Inscriptions/Reaper's Plea.jpg"/> | ||
</figure> | </figure> | ||
| − | <figcaption>The Reaper's Plea | + | <figcaption>The Reaper's Plea</figcaption> |
</a> | </a> | ||
| Line 85: | Line 85: | ||
<img src="/Media/Olam HaMikra/ANE Inscriptions/Ketef Hinnom Scrolls - Priestly Benediction.jpg"/> | <img src="/Media/Olam HaMikra/ANE Inscriptions/Ketef Hinnom Scrolls - Priestly Benediction.jpg"/> | ||
</figure> | </figure> | ||
| − | <figcaption>Ketef Hinnom Scrolls - Priestly Benediction | + | <figcaption>Ketef Hinnom Scrolls - Priestly Benediction</figcaption> |
</a> | </a> | ||
</div> | </div> | ||
| Line 138: | Line 138: | ||
<img src="/Media/Olam HaMikra/ANE Inscriptions/Bubasite Portal at Karnak - Shoshenq I Relief.jpg"/> | <img src="/Media/Olam HaMikra/ANE Inscriptions/Bubasite Portal at Karnak - Shoshenq I Relief.jpg"/> | ||
</figure> | </figure> | ||
| − | <figcaption>Shishak's Campaign and Egyptian Sources | + | <figcaption>Shishak's Campaign and Egyptian Sources</figcaption> |
</a> | </a> | ||
</div> | </div> | ||
| Line 174: | Line 174: | ||
</figure> | </figure> | ||
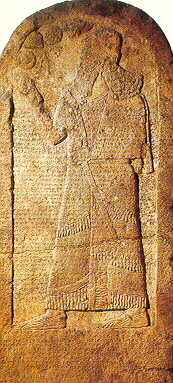
| − | <figcaption>Aram's Relations with Israel | + | <figcaption>Aram's Relations with Israel</figcaption> |
</a> | </a> | ||
</div> | </div> | ||
| Line 184: | Line 184: | ||
</figure> | </figure> | ||
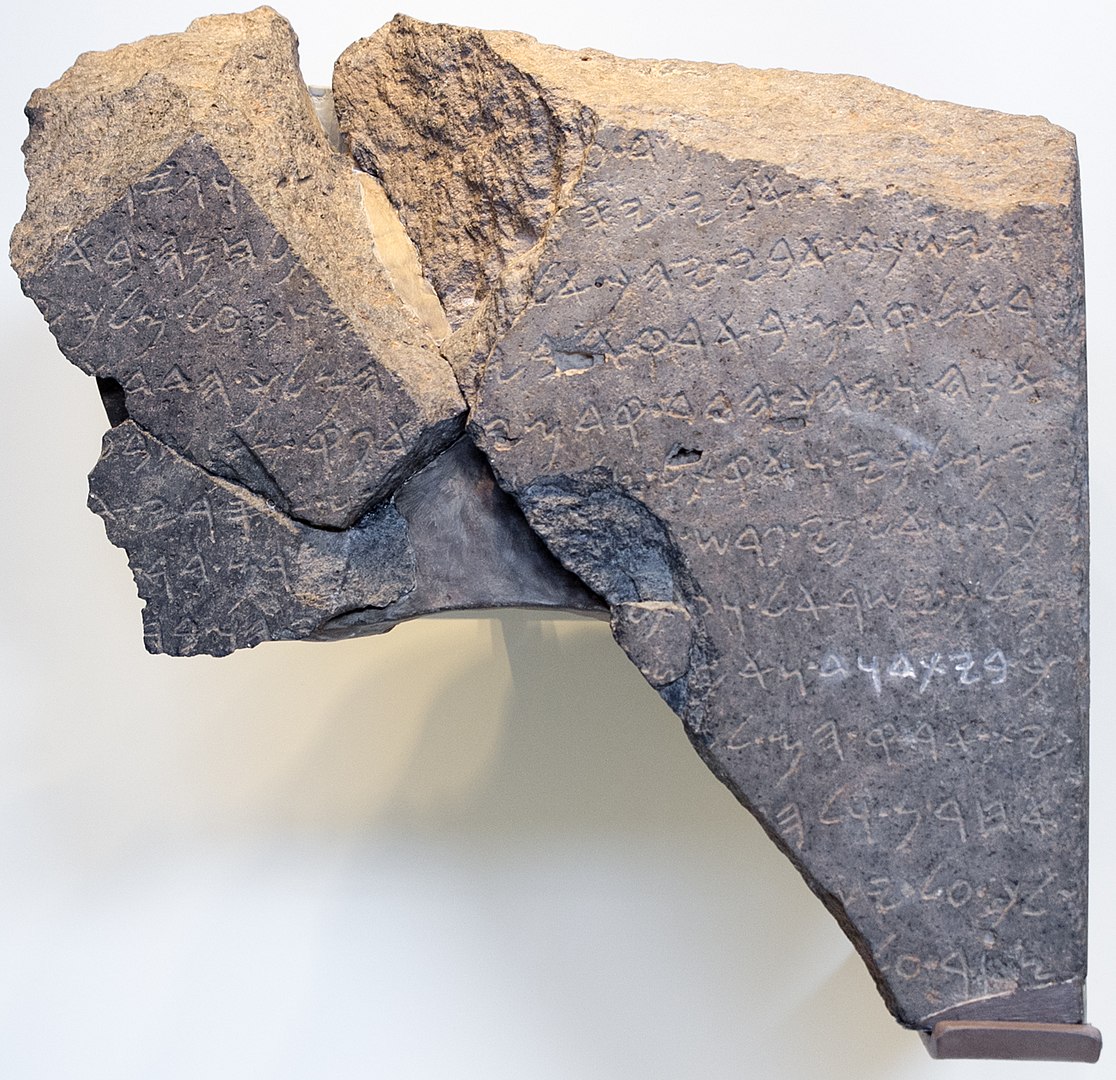
| − | <figcaption>The Tel Dan Stele | + | <figcaption>The Tel Dan Stele</figcaption> |
</a> | </a> | ||
</div> | </div> | ||
| Line 194: | Line 194: | ||
</figure> | </figure> | ||
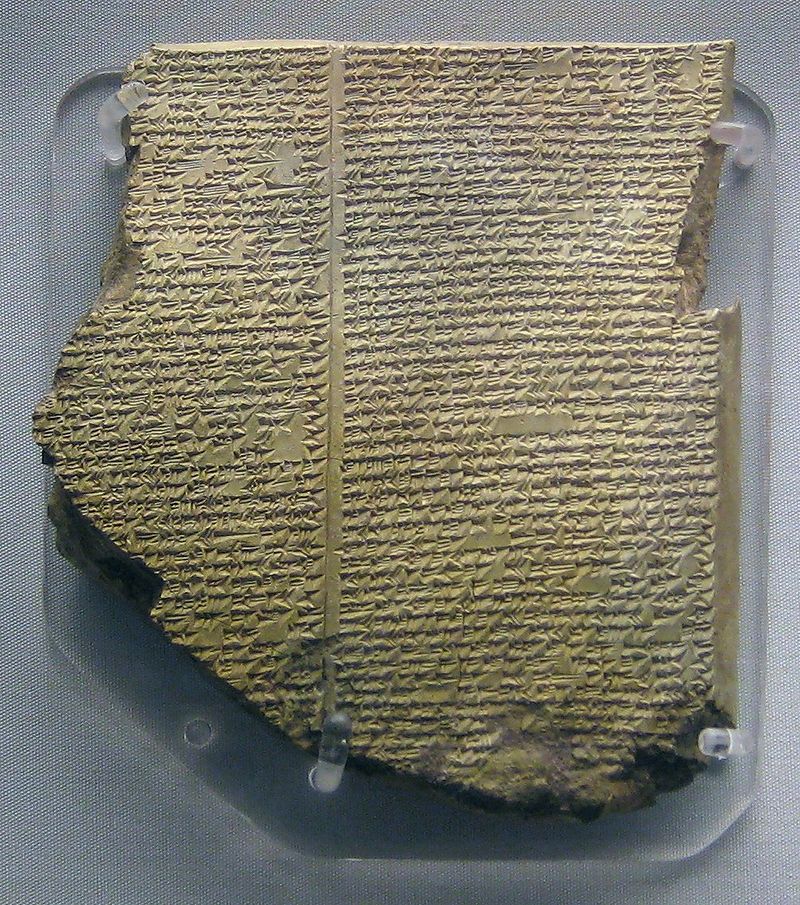
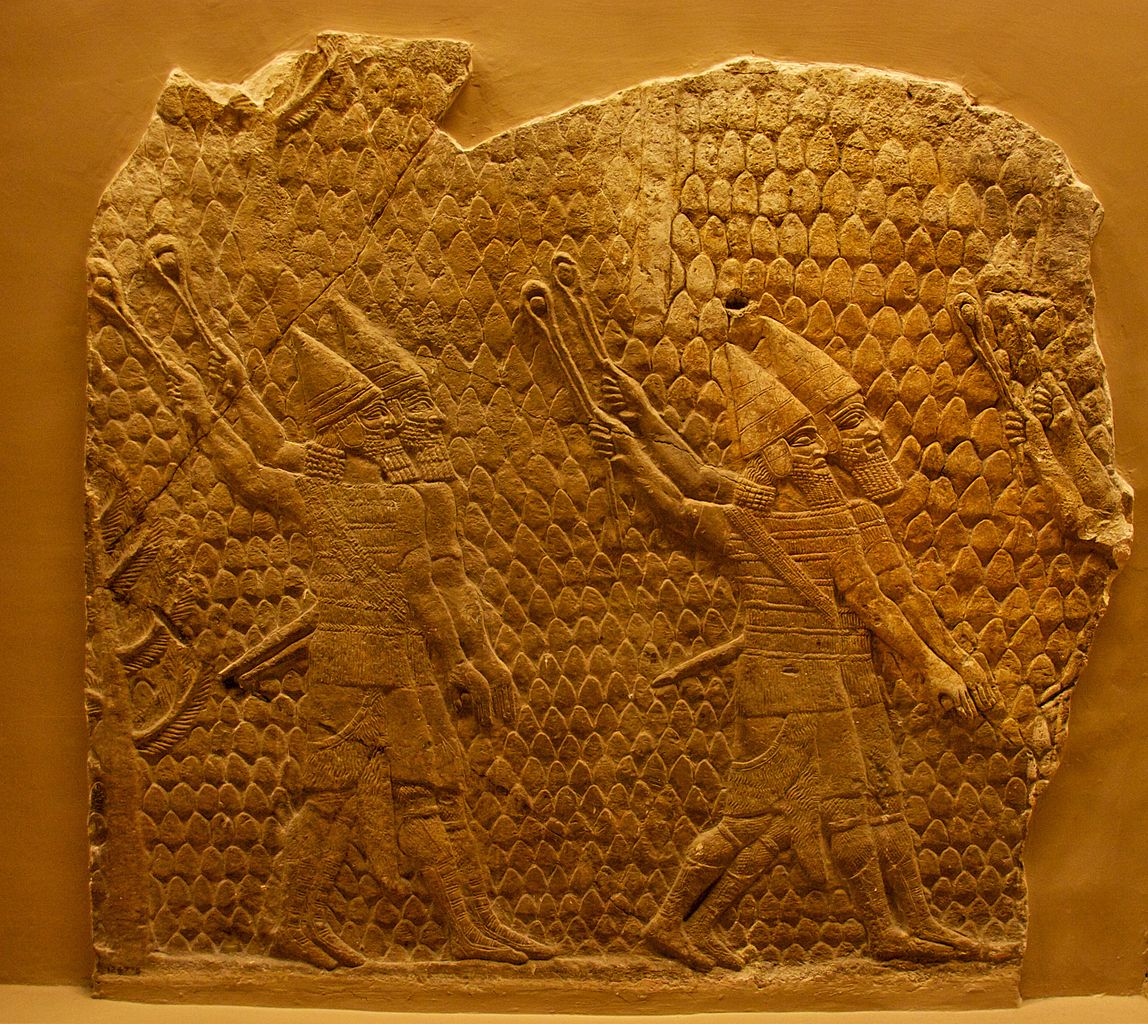
| − | <figcaption>Sancheriv's Campaign | + | <figcaption>Sancheriv's Campaign</figcaption> |
</a> | </a> | ||
</div> | </div> | ||
| Line 204: | Line 204: | ||
</figure> | </figure> | ||
| − | <figcaption>The Last Kings of Yehuda | + | <figcaption>The Last Kings of Yehuda</figcaption> |
</a> | </a> | ||
</div> | </div> | ||
| Line 233: | Line 233: | ||
</figure> | </figure> | ||
| − | <figcaption>Sancheriv's Campaign | + | <figcaption>Sancheriv's Campaign and Assyrian Sources</figcaption> |
</a> | </a> | ||
</div> | </div> | ||
| Line 250: | Line 250: | ||
</figure> | </figure> | ||
| − | <figcaption>Lachish Ostraca | + | <figcaption>Lachish Ostraca</figcaption> |
</a> | </a> | ||
</div> | </div> | ||
| Line 268: | Line 268: | ||
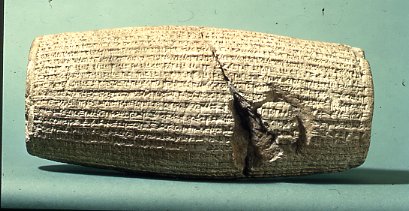
<img src="/Media/Olam HaMikra/ANE Inscriptions/Cyrus Cylinder.jpg"/> | <img src="/Media/Olam HaMikra/ANE Inscriptions/Cyrus Cylinder.jpg"/> | ||
</figure> | </figure> | ||
| − | <figcaption>The Cyrus Cylinder | + | <figcaption>The Cyrus Cylinder</figcaption> |
</a> | </a> | ||
</div> | </div> | ||
Version as of 12:16, 7 November 2020
Tanakh and the Ancient Near East
Click on any picture below for discussion.